Adding your first field
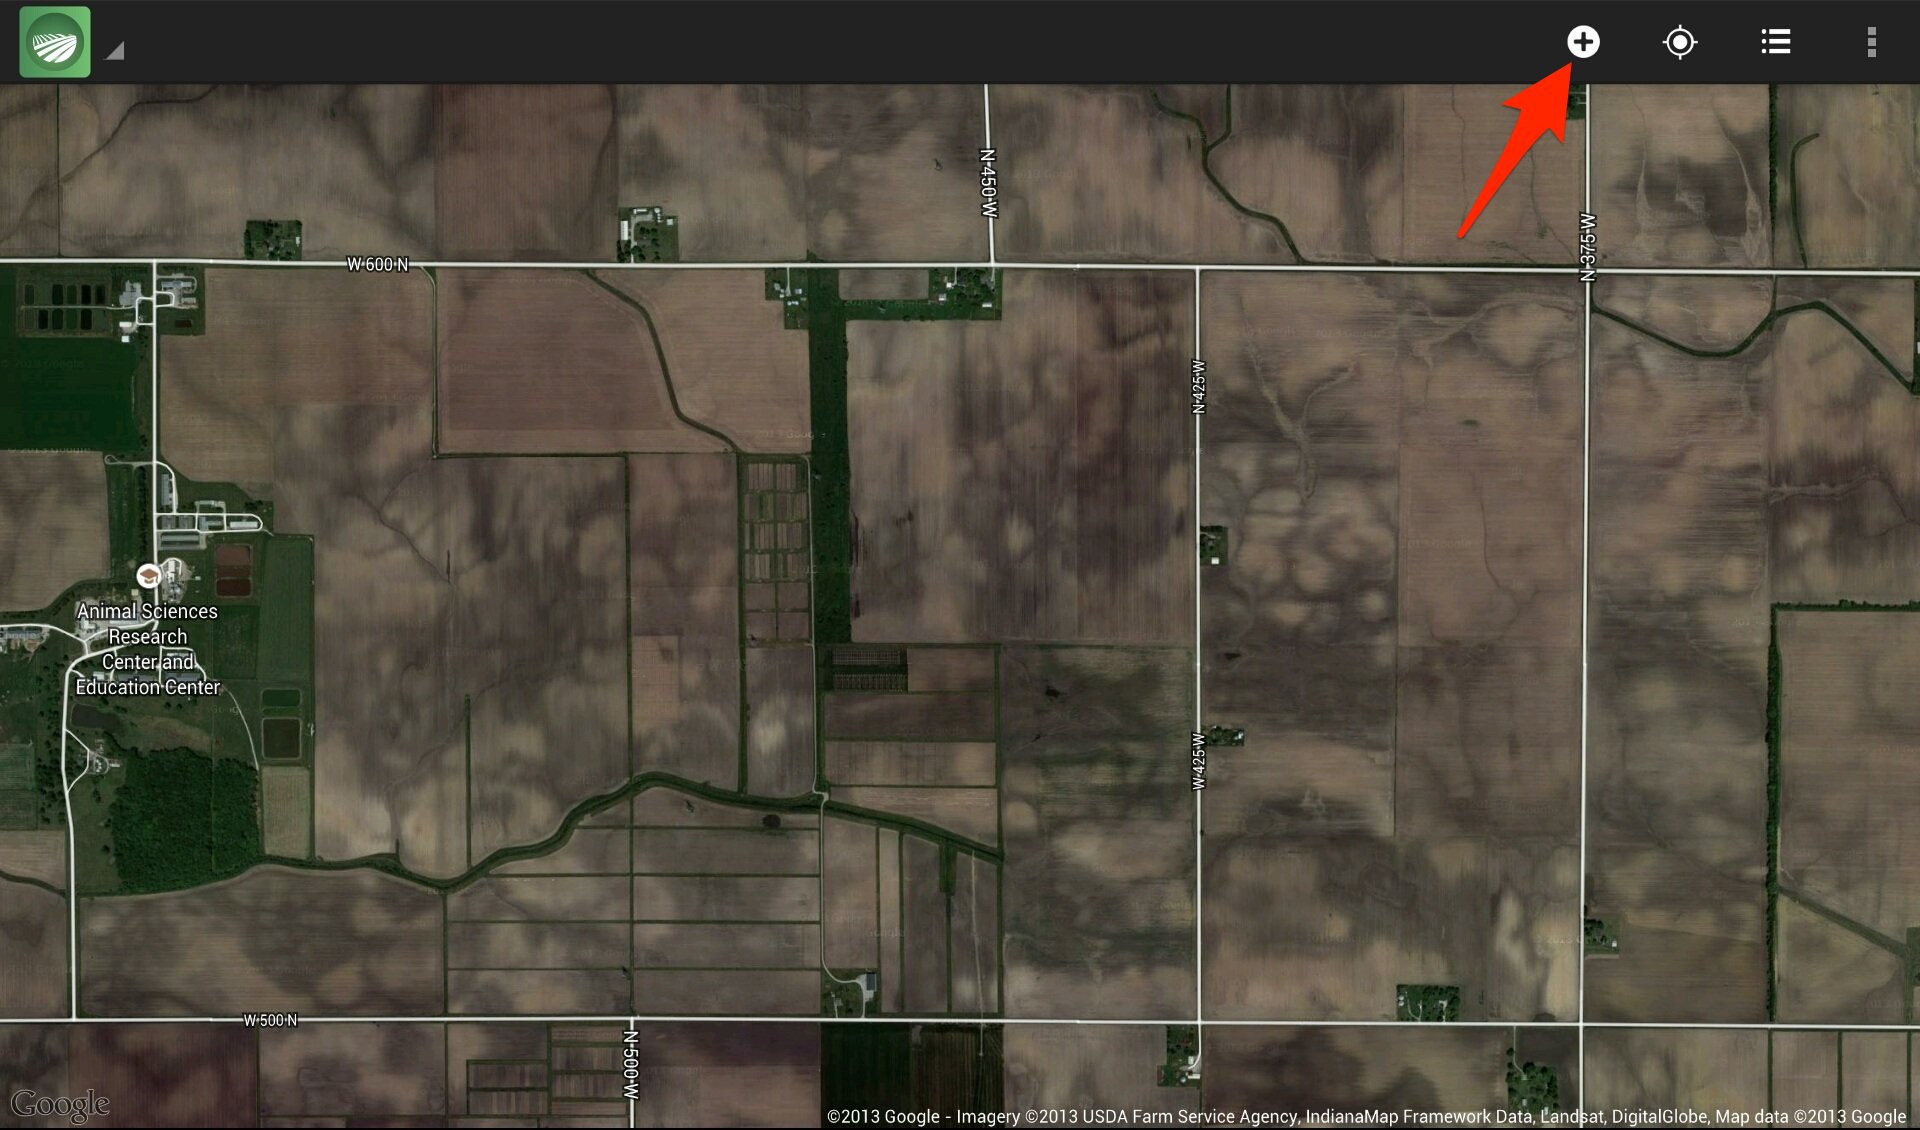
When you open the Tillage App for the first time, you'll want to start adding your fields. To add your first field, tap the action bar icon for a new field.
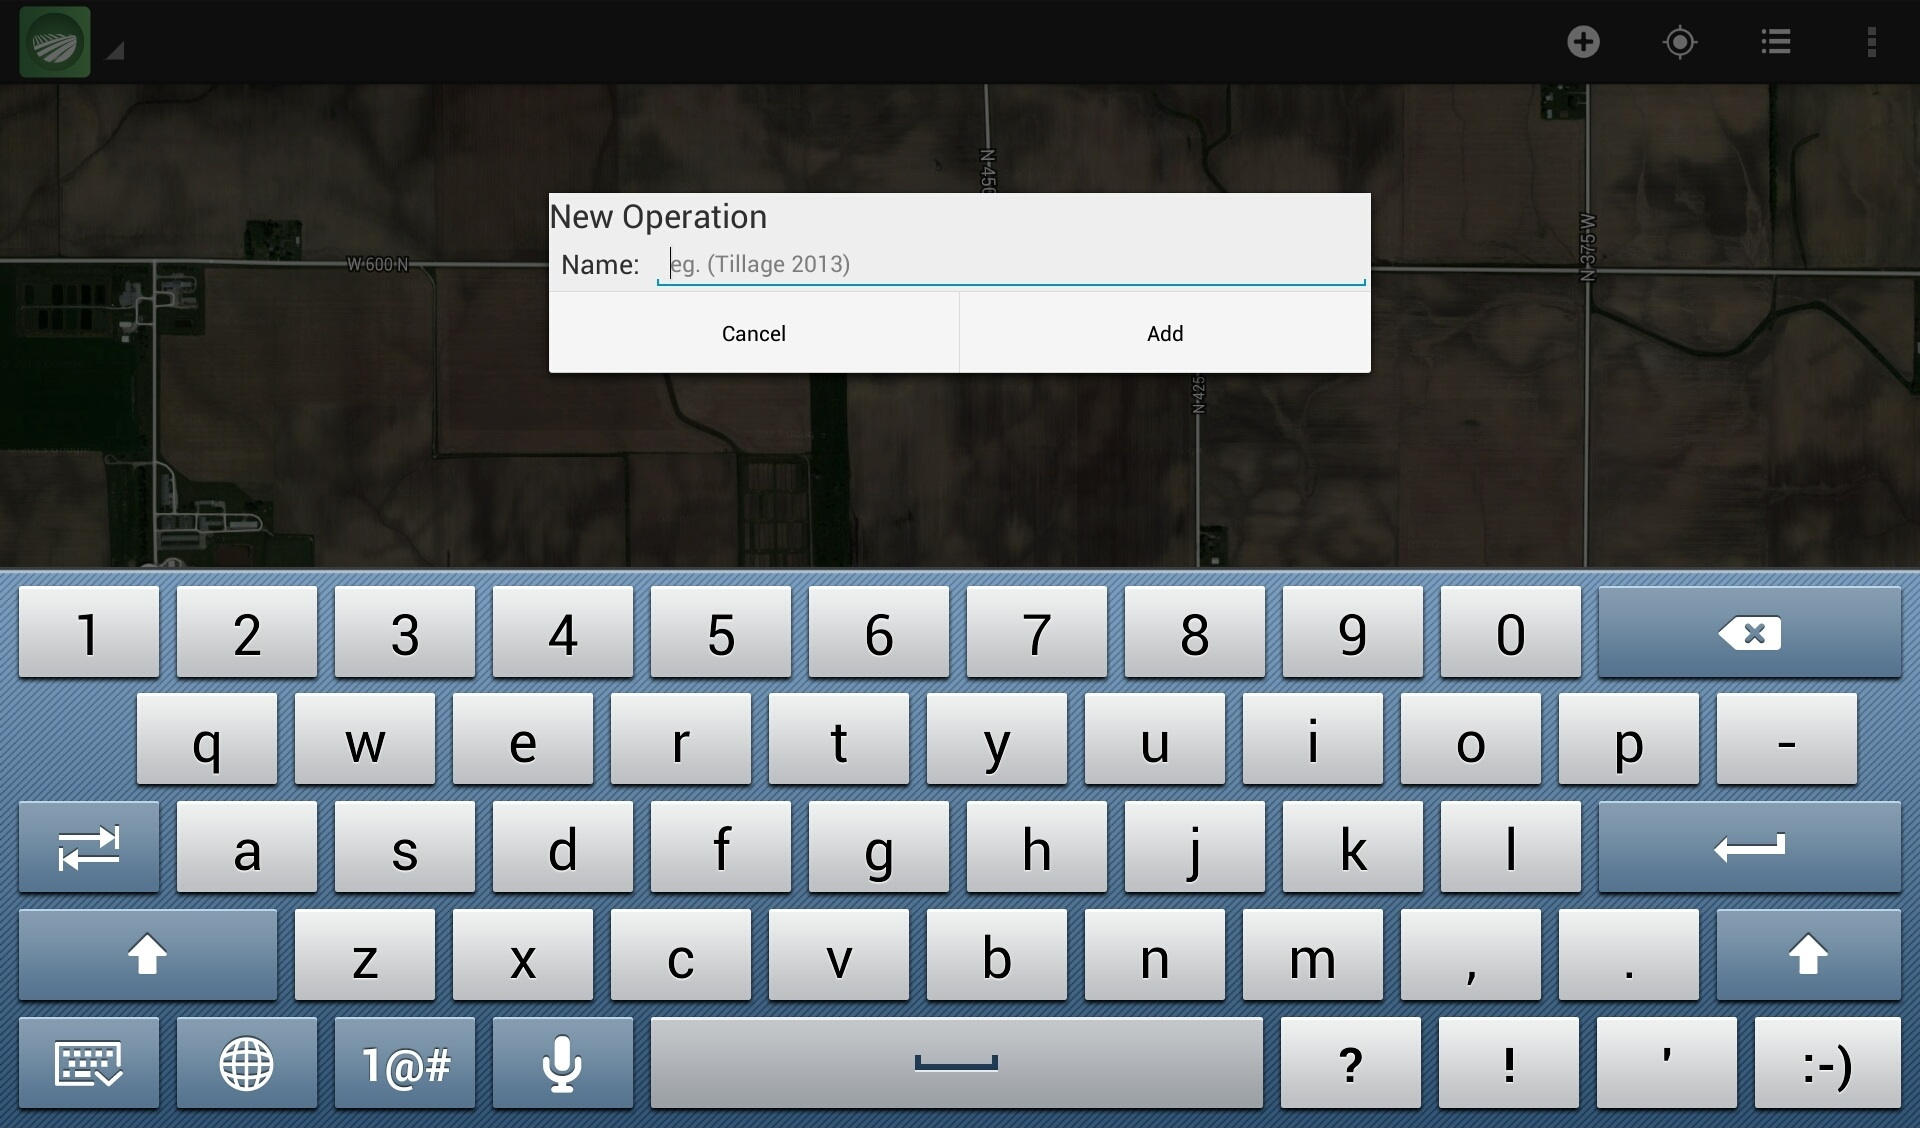
Since this is the first field, we'll help you get going by starting a new operation type. Give the new operation type a name. You can be as specific or generic as you need to be. If you only have a couple fields and you'll chisel all of them, maybe "Fall 2012" would be sufficient. If you have a lot of fields and you want to keep track of which ones were strip tilled, maybe "Fall 2012 strip till" would be more helpful.
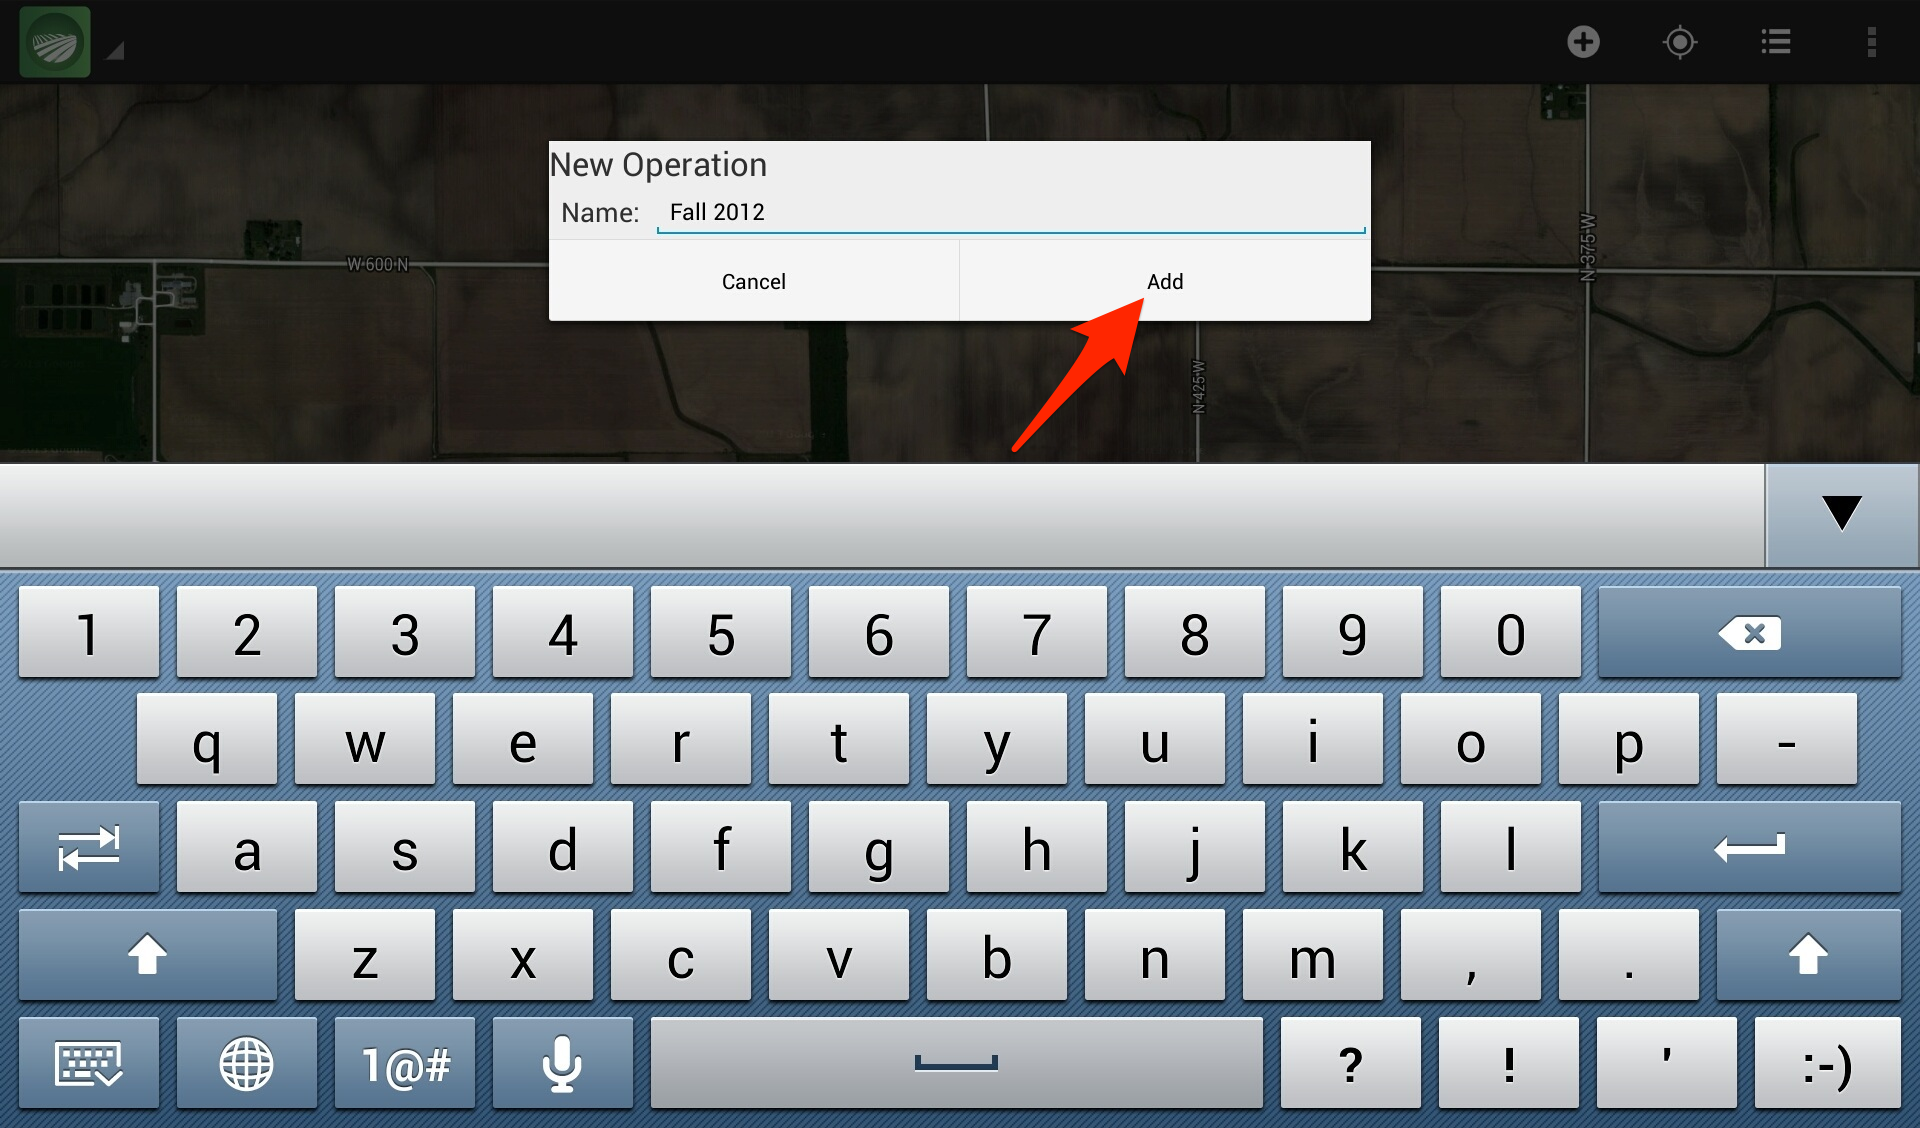
After you've given the operation type a name, click "Add", and you'll see it on the left side of the action bar.
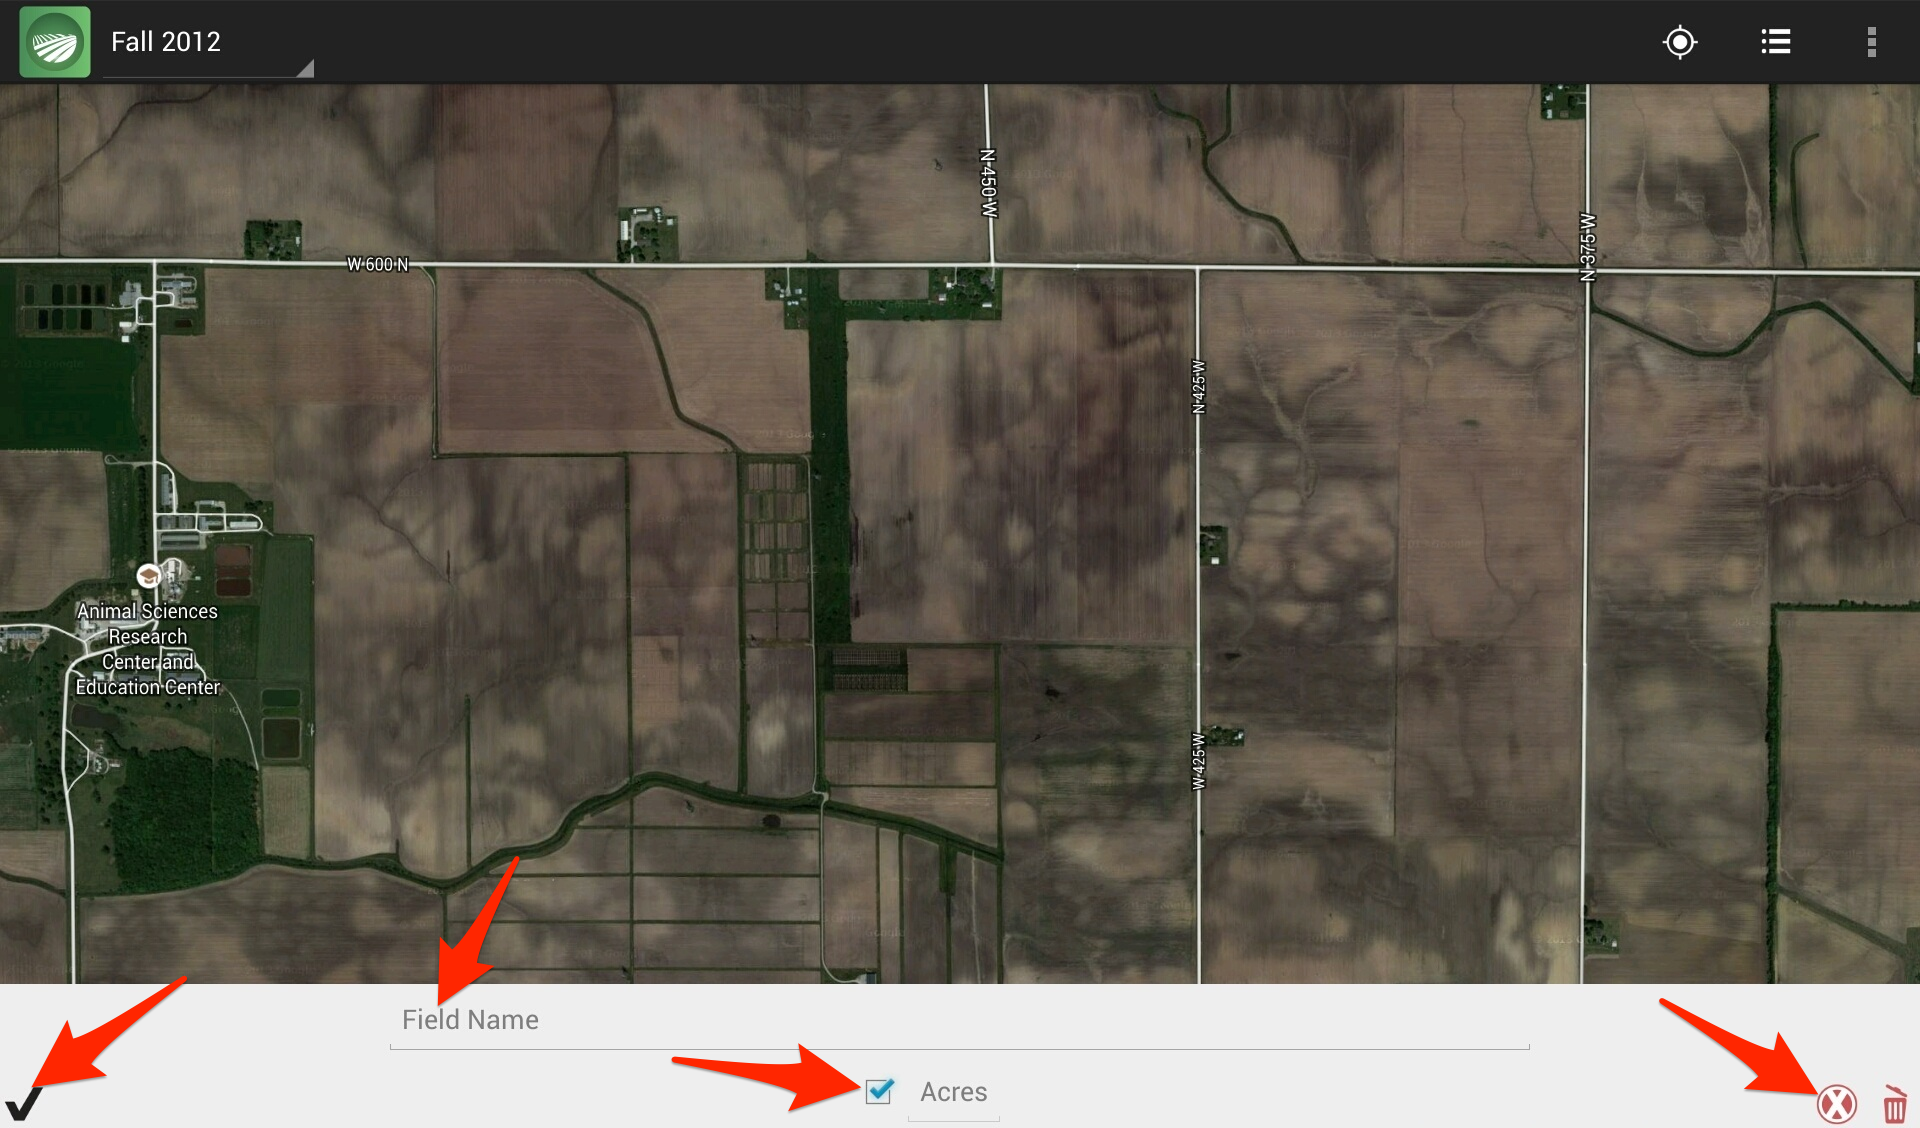
Now you're ready to draw the first field. The field drawing menu will help you name the field and draw the boundaries. The check mark in the box next to "Acres" means that the app will calculate the field area based on the boundaries. If you would like to change the number, uncheck the box, and type the correct number in the text field. The red "x" will delete the last boundary point. When you are done with the field boundaries, tap the black check mark to continue. For an example field boundary drawing, continue to the next tutorial for adding fields to your farm.